Proper Lifting Technique: 8 Commandments to Avoid Injury When Lifting

Lower, upper, spinal or otherwise, experiencing back pain is practically an aging rite of passage. Four out of five people will experience back pain in their lifetime and, considering sprains and strains are the most common work injury (over 266,000 cases in 2020 alone), it’s not unlikely that injury will occur in the worksite.
So how can you prevent back injuries when lifting, bending and schlepping are all just part of the job? It all starts with proper lifting technique.
How to Lift Heavy Objects: Safe Lifting Techniques in the Workplace
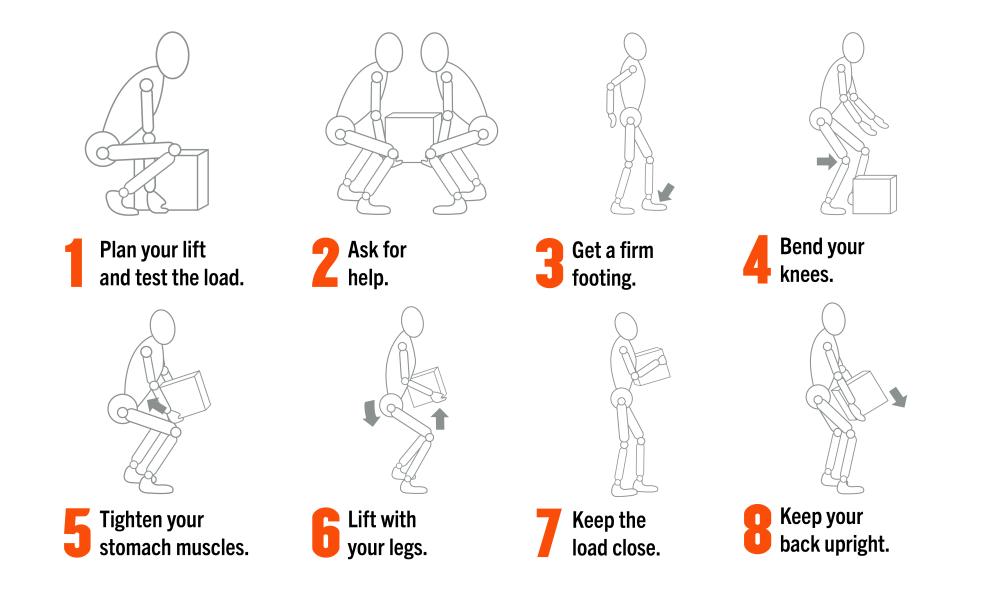
When performing the common act of lifting, there are a handful of simple but important steps workers can take to further reduce the risk of injury. We call them The 8 Commandments.
- Plan the lift and test the load
- Ask for help if the load in unmanageable
- Get a firm footing
- Bend at the knees
- Tighten the stomach muscles
- Lift with your legs (not with your back)
- Keep the load close to your body
- Keep your back upright
The Hierarchy of Controls: Further Minimizing the Risk of Back Injuries
While proper technique is the backbone of lift injury prevention (pun intended), the entire hierarchy of controls should also be considered to see if the risk can be further reduced before the lift even occurs.
Elimination or Substitution
Start with elimination or substitution. Does the heavy object really need to be lifted or moved? Can the same task be accomplished in a different manner? Can the task be accomplished with a machine or tool as a substitute? While many times the answer is “no”, these questions are the best place to start.
Engineering Controls
If the risk cannot be eliminated or substituted, employers should consider any other controls that might help reduce the risk. This can be as simple as rearranging workstations or processes to reduce lifting, reaching, twisting or bending. When possible, having two individuals perform a task instead of one can greatly improve standard practice. Reduce or eliminate awkward reaches by providing a ladder or step stool, or simply getting physically closer to the task at hand. These are just three examples of controls that can be put in place to lower the risk of sprain and strain injuries.
Administrative Controls
Beyond elimination, substitution and implementation of engineering controls, workers should be thoroughly trained on the hazard. This of course includes proper lifting technique, as well as conducting job assessments to help workers identify tasks and activities where they are most vulnerable to a strain or sprain. Labeling items with reminders such as “Heavy - Lift with Care” is another effective way to make sure workers take proper precautions. Many injuries occur when workers, especially those that are new to the site, are caught off guard or simply unaware of the risk.
PPE: Using Back Supports to Aid in Proper Lifting Technique
The last line of defense in the hierarchy of controls is personal protective equipment which, in this case, means back supports. When worn properly, a back support enhances the body’s intra-abdominal pressure and moves stress away from the spine. And, in addition to providing lower back and abdominal support, a back support promotes proper posture and reminds the worker they are about to lift. While back supports can be an incredibly helpful tool in injury prevention, it’s important to note that they do not make workers stronger or cure/eliminate existing injuries.

How to Wear a Back Support
Wearing a back support wrong is like wearing a cracked hard hat or keeping your safety glasses on top of your head—pointless and ineffective. For maximum benefit, back supports need to be properly (and tightly) secured around the midsection.
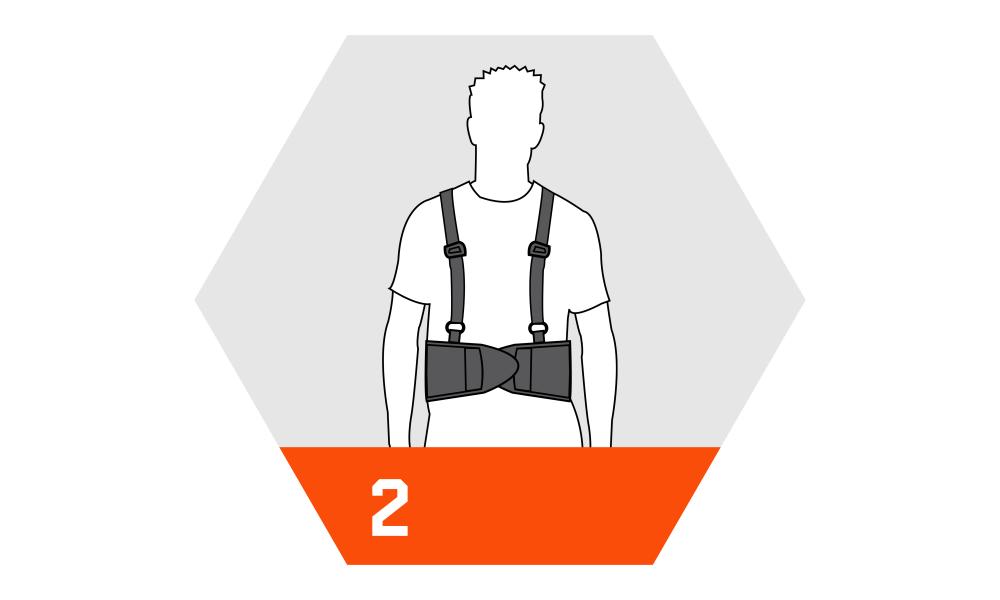
1. Slip the back support on.

2. Grasp each end of the waistband. Stretch the right end across the left and attach. The upper edge of the waistband should sit approximately 2” (2 finger widths) below your naval. The support should feel snug, but not tight. To test the fit, make sure you can comfortably run a finger between the support and your body.
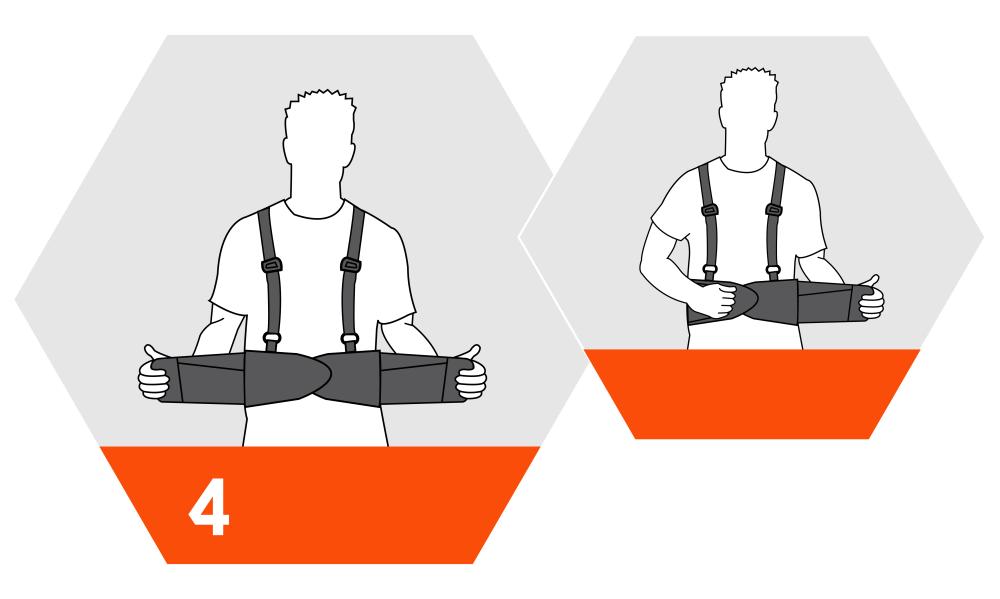
3. If the support has suspenders, adjust the straps for a comfortable fit without tension.

4. If the support has secondary elastic/tension bands, leave them loosely fastened until it is time to lift. Prior to lifting, grasp these bands and stretch forward as far as possible before securing in a comfortable position.
*Always be sure to read full product instructions before using back and other supports to make sure you are properly fitting and wearing your PPE.